The 5 Best Kitchen Pantry Systems for Real Homes (That Actually Survive Humidity, Kids, and Everyday Life)
A perfectly organized pantry isn’t a luxury — it’s the difference between “What’s for dinner?” taking 4 minutes or 40.
After designing and installing pantries in hundreds of homes (from 1920s Highlands bungalows with no built-ins to new builds in Norton Commons), we’ve tested every container, shelf, and turntable on the market. These are the only five systems that survive real life: little kids, 90 % summer humidity, teenage snack raids, and zero daily maintenance.
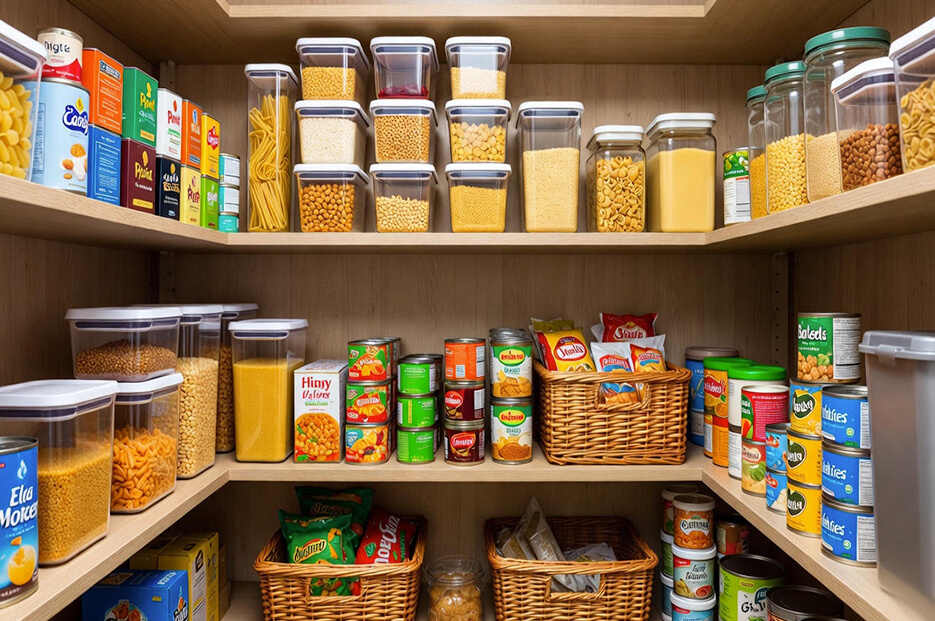
1. OXO Good Grips POP Containers – The Gold Standard
If you buy only one thing, make it these.
Why they win:
- One-button airtight seal (actually works after two years of daily use)
- Keeps brown sugar soft and cereal crunchy even in July
- Stack perfectly and come in 30+ sizes
- Clear body + labeled tops = no more mystery flour explosions
Real-client example: A St. Matthews family went from 11 half-empty cereal bags to five labeled POP containers. They saved $180/year on wasted food and cut morning chaos in half.
Best sizes to start with:
- 4.4 qt for cereal/flour
- 2.4 qt for pasta and snacks
- 0.9 qt six-pack for baking sprinkles and chocolate chips
Where to buy locally: Target (Shelbyville Rd or Springhurst), Bed Bath & Beyond remnants at Jefferson Mall, or Amazon same-day.
2. Bamboo Shelf Risers + Clear Bins – Instant Space Doubling
Most older pantries have one or two deep shelves. One can of tomatoes goes in front and suddenly you own twelve hidden cans in the back.
Fix: Raise everything.
Our go-to combo:
- Bamboo or metal risers (mDesign or Seville Classics on Amazon)
- Clear stackable bins with handles (iDesign or The Home Edit line at The Container Store)
This setup turns one shelf into two usable layers and lets you pull an entire bin of snacks forward like a drawer. Bonus: bamboo doesn’t rust or swell when the humidity spikes.
Pro move: Put heavy items (canned goods, appliances) on the risers and light bulky stuff (chips, paper towels) in the pull-out bins on the lower level.
3. Two-Tier Lazy Susans (YouCopia Crazy Susan or Copco) – Corner Chaos Solved
Deep corner cabinets and lazy Susans that spin too fast are the #1 pantry frustration we hear.
The new generation fixes both problems:
- Non-skid surface so bottles stay put
- Two independent tiers (oils and vinegars on top, spices on bottom)
- Tall sides so nothing flies off when your teenager slams the door
We install these in almost every butler’s pantry remodel. Suddenly salad dressings, hot sauces, and baking extracts are actually findable.
4. Over-the-Door or Back-of-Door Metal Rack – The Hidden Superpower
Shallow reach-in pantries (common in Crescent Hill, Cherokee Triangle, and Old Louisville) have almost no floor-to-ceiling space. The back of the door is free real estate.
Best option: Simple human or Elfa over-the-door rack with adjustable baskets. Uses:
- Extra spice storage
- Snack central for kids (they can see and reach)
- Foil, plastic wrap, and ziploc box hotel
Because it’s metal (not plastic), it never warps in the humidity.
5. Chalkboard Labels + Decanting Strategy – The “I Can Find It” Game Changer
Pretty containers are worthless if you still have to open six lids to find the oatmeal.
Our exact decanting system:
- Buy bulk (flour, sugar, oats, rice, pasta) at Costco or Trader Joe’s
- Transfer immediately into matching airtight containers
- Slap a chalkboard label on the front and top (write once, erase when you change contents)
Result: You can see at a glance what’s low, nothing expires unnoticed, and your pantry looks like it belongs on Pinterest — without daily effort.
Bonus: The 10-Minute Weekly Pantry Reset (Takes Longer to Read Than to Do)
Every Sunday night while the kettle boils:
- Pull everything one shelf forward
- Wipe spills
- Toss anything expired (check dates on baking powder and yeast!)
- Push everything back flush Takes 6–8 minutes once the systems above are in place.